This week, I wanted to try something different. I love the mariner's compass, and have paper pieced a few, so wondered what it would look like in FMQ. I agonised a bit over whether to have all the quilting in one or more colours and whether or not to paint the compass. In the end, I went for 'less is more' and added a little colour in the compass using Isacord in turquoise, yellow and red.
As usual, my accuracy has let me down. I drew the cable badly - in particular, the top part sinks in the middle and the chalk markings were not as crisp as they could have been, making my quilting a bit uneven.
On the upside, I felt confident enough to FMQ a wavy design between the arms of the compass and a different wave design around the compass. I was really happy with my little pebbles.
If only I could discipline myself into ensuring that my drawn design is perfect before I start to quilt, the result will be much better. I think my problem is that I am always hurrying...note to self..STOP IT!
Happy quilting!
I've been quilting since 2013. This blog is my personal quilting diary, that charts my progress (and occasional regression) from the start. I use it so I can look back at my past projects...and hopefully see my skills improve!
Wednesday, 25 February 2015
Thursday, 19 February 2015
Week 7 of my 2015 FMQ Challenge
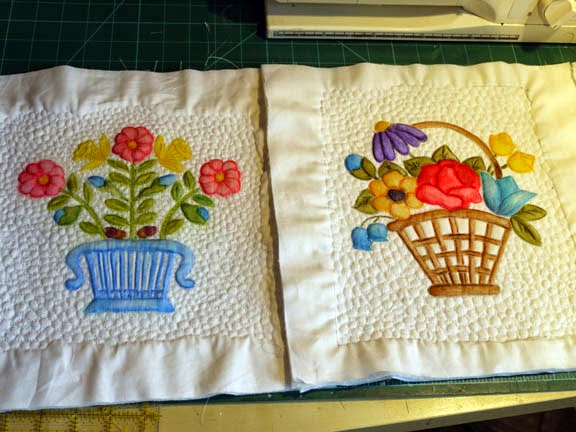
This week I decided to practice little pebbles. I also thought I'd try out the Derwent Inktense pencils I bought a couple of weeks ago.
I tried two different methods of using them.
Method 1
FMQ the piece first, then colour in the drawing. I wet the colour to set it using water.
Advantage: easy to do and the quilting thread takes on the colour of the pencils
Disadvantage: the colour bled - pretty badly, in places. It even bled through the wadding and backing cotton in a couple of places. I didn't think the colours looked as strong in the finished piece. My guess is that some of the colour seeped into the batting, diluting the colour on the surface.
Method 2
I ironed a piece of freezer paper to the white cotton top fabric, then drew and coloured with the pencils. I then applied textile medium with a very fine brush to the drawing. I removed the freezer paper, and once dry, I sandwiched the top, wadding and back together and FMQ'd it.
Advantage: easy to do. Better strength odf colour and definition.
Disadvantage: the thread used for FMQ stands out. I chose to go back over the threads with the pencils, but I could have used coloured threads for the FMQ.
Drawing prior to fixing colour.
Method 1 used
Method 2 used
Tuesday, 10 February 2015
Week 6 of my FMQ Challenge
2015 is the year I have challenged myself to improve my free motion quilting. This is:
Week 6
This week, I wanted to try a couple of different backgrounds. I have long wanted to try pebbles, and I felt that this was the right time to try. I also wanted to try scribbling, as I have been getting a bit bored with stippling.
I used Kaffe Fassett shot cotton in purple for the front and lavender for the back, with cotton batting. Threads used were Superior metallic gold, silver, and Isacord taupe, and King Tut lavender in the bobbin. I used a 90/14 topstitch needle.
Criticism - my feathers have definitely improved. I really like the effect that scribbling gives. It gives the opportunity to add another colour to a wholecloth piece. I like the pebbles, but found all the movement reauired when quilting, hard on my hands - note to self, maybe a lighter touch would help. The most annoying thing about this piece is that I didn't mark carefully enough, so the cables, in particular, are a bit wonky. I hope I will learn from this, and do better next time.
I have also started the first block of the 2015 Quiltmania Mystery Quilt. I have pieced the block and have just started the embroidery.
Subscribe to:
Posts (Atom)